
Mounting Puck Torque Specs & Maintenance


Mounting Puck Torque & Maintenance
Proper mounting torque is key to keeping your Lone Peak Camper secure and performing as designed. Below you’ll find torque specifications, best practices, and a quick maintenance reminder from Kyle on long-term care.
📘 View Full Installation Guide | 🎥 Watch Kyle’s Mounting Puck Video
Torque Specs & Best Practices
-
Always use a torque wrench measured in inch-pounds (in/lbs).
-
Check your torque settings weekly for the first month after installation.
-
As the camper settles onto the truck bed, small shifts are normal — that’s just everything settling in.
-
Regular torque checks keep your camper securely mounted and help prevent long-term vibration wear.
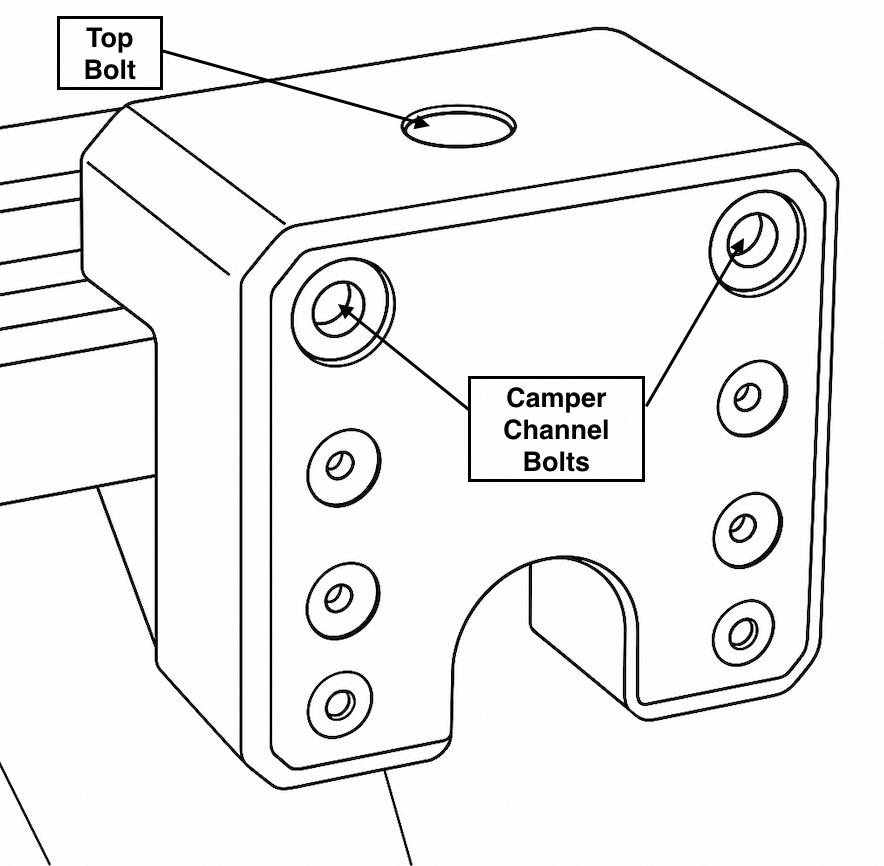
Torque Specification
| Bolt Location | Quantity | Torque Spec | Notes |
| Top Puck Bolt | 1 Per Puck | 75 in/lbs | Use a torque wrench |
| Camper Channel Bolts | 2 Per Puck | 100 in/lbs | Use a torque wrench |
| All other puck hardware | Variable | Hand Tight | Snug the hardware to the bed — no torque wrench needed |
Maintenance Tip from Kyle
If you ever need to adjust or re-torque a puck bolt, remove the bolt first and apply Blue Loctite before reinstalling.
This helps keep bolts locked in place and prevents loosening from normal road vibration.
Loctite Reminder
“Your camper and truck bed will naturally settle together over the first few trips. A quick torque check each week for the first month will keep everything tight and dialed in. After that, you can back off to checking every few months or after rough off-road use.”


